Showing posts with label wonky. Show all posts

Wednesday, April 2, 2014

Day 7 - Flags on a Stick Blog Hop - Here's Waving at You Kids....

Welcome to Day 7 of 
Flags on a Stick Blog Hop!


This time around, I decided to "get on the stick" and create something for our shop.
We have a really cute fabric panel with letters and numbers
from "In the Beginning Fabrics"
The line is called "Hoopla & Everyday Fun" by Jennifer Heynen.

We are never opposed to enjoying a little
"HOOPLA"


This fabric would be the perfect start of some
FUN !


If you've been following the hop, these letters should look familiar.

My good friend and quiltin' sista'
Mary Pat from Quilting Quietly 
was so "Hoppy" to find them during one of her visits to the shop.

(if you missed her 'toad'-ally awesome flag - click on her name above - ribbit!)

It's so much fun to have a blog hoppin' friend close by...
..Even sweeter that we can bounce ideas off one another...
or in this case...
use some of the same fabrics with completely different results!
I'm so glad we're


I had a little "saying" in mind....
I began with some fusible web...
(iron, iron)
cut out the letters and appliqued them in place...
hmmmm....
still needed something else....


I pulled out a couple handfuls of 'scraps' from ye ole scrap bag...
(and I DO mean "scraps" ~ I shouldn't save 'everything' but I do...it's a curse!)

OooEee....FUN time in progress...
making a few wonky blocks....

Oh lookie look...see the yellow arrow?
See it pointing?
"Thumbs Up"...
Yes, I was pretty pleased with how things were shaping up!

hmmm...still lacking....what else do I need?

But of course...
there must be buttons!

When all was sewn and done...
it was time to wave the flag....


As much as I wanted to hang our flag outside the door of our shop...
well...darn...cement! 


How does one stick a "stick" in cement?


Very simple....
One does Not!


Instead...
our flag hangs right inside the front door....


We LOVE it!

Another cutie button...and we must have a cat!


I used velcro on the straps for easy hanging on the door.

Had it been hanging outside, I might not have worried about the 'back'...
but it's not outside...
and for a few days I pondered what it should say.
(ponder, ponder)

"Thanks for Stopping In and Have a Great Day"
would have been nice....
but way too many 'letters'...
way too little 'space'....

Then it came to me....


After leaving the nest to make a life with my Spouse...
whenever we would visit dear Mom & Dad...
as we made ready to leave...
( Hugs hugs, Kisses kisses )
my sweet parents would always say the same thing....
Every Time!

What a great way to remember them...
a great way to let everyone know that walks thru our door...
we are truly glad they came!

I can hear my Mom now questioning about the way I spelled "Thanks"...
but ya do what ya do when space runs out.
Besides....
how many times do we ever get to use the
"X"


Thank you Thearica and Mdm Samm for another amazing adventure!
Special thanks as well to our sponsors: 
and
Visit them all...give 'em a 'wave' and tell them how much you've enjoyed the hop!


Thanks for visiting...but remember, I'm not waving alone today...
Click the links below for more fun on a stick...
Which one will be your favorite?
I'm so glad I don't have to pick!

April 2nd


Sunday, February 24, 2013

Project Quilting Challenge 4 - Wish Upon A Star and a mini tute

I was sew excited when Kim over at Persimon Dreams announced "Wish Upon A Star" as the Project Quilting 4th challenge. I just love anything STARS when it comes to quilting and yet strangely enough I don't have one star quilt....and one week later with the challenge due today....I still don't have a star quilt..
but...
I was star struck with ideas....
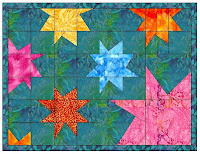
I've been in absolute starry eyed love with wonky stars ever since I came across 
Elizabeth Hartmans
 I just love her blog Oh Fransson!

So I punched up a little sparkle of my own in EQ...
but I just knew no matter how hard I wished
I wasn't going to make a whole quilt this week.

Ok then...maybe a mug rug?
That sounded do-able....
...another EQ fantasy....
or maybe something like this...
Of course...spending all my time trying to make a decision...left me with no time for even a mug rug.
-drats-
Ok then, plan C...
 a "Pincushion"....
afterall, Kim said we had to have at least ONE star...
but Saturday night arrived....
still nothing done...
so I hid in my sewing room while supper was cooking....
dug down into my scraps....
and I DO mean scraps!

Cut out little 1-1/4" squares....
Made up 4 star points...here's one
(See Oh Franssons! super tutorial to make your stars...
remember now, mine are super mini)

Sewed my little blocks together...

Layered with 2pcs of batting and backing....
Sewed around the edges through all layers leaving a small opening for turning 
(so sorry, no pic - another one of those caught up in the moment and anxious to finish)....
turned right side out...
stuffed...
handstitched closed.
Whipped a little pinback on the back...

and Ta-Da! 
(I just love these Ta-Da moments)

A super cute little pin that's a pincushion too! 
Only 2-1/4" square, 
it's just the perfect size
 Now just maybe I can keep the pins out of my clothes, my body and the washing machine!

Thanks again Kim at Persimon Dreams...
I know my project is teeny and tiny...
but if not for the challenge it wouldn't be anything at all. 

I hope ya'll will try some wonky stars...I'd love to see what you're inspired to do!
Oooh...how about a Wonky Star Pincushion contest? Anyone?
Leave a comment if you're interested in that...it could be fun!
Maybe there could even be....a Prize!
Yeh...I Like it!
(dontcha love the way I just brainstorm out loud?)
Keep tuned in and just maybe it will happen.

Til 'laters...thanks for stopping by and have a great super fantastic week!
Lynn ~ The Thimblemouse >"<

PS...No, I didn't forget...I'll be back soon with the "KiDees" and their stories - MeOw!
For now? I need me some ZZZZzzzzz's!


Sunday, January 13, 2013

Project Quilting - Some Wonky Eye Candy for Mom and a Quickie Tute For You

One of the things I love most about blogland is discovering new places and sites to see. Late at night I do most of my poking around looking at this and at that...so many ideas...my head could just burst
My New Years resolution is to make EVERY day COUNT! So when I find a new challenge or blog hop that just tickles me...instead of sitting on the sidelines... this year I'm jumping in with both feet.
Last Sunday I came across Project Quilting from Persimon Dreams and I couldn't resist giving it a try. A new challenge is posted weekly - due on the following Sunday - and it must be finished and done. Yikes! 
The first challenge for Season 4 (wow - I missed out on 3 Seasons already?) - was a "Square in a Square".  Thankfully it could be any size or shape, not necessarily traditional...as long as it was started AND finished during that week. 
I'm always trying to make a little something with my Mom in mind...I love decorating her wall with some kind of eye candy....so I grabbed a charm packet of pretty pinks (cuz we all know that's Mom's most favorite color in the whole wide world!).
I ended up with this wonky little wall hanging...finished just in time!
I thought about foundation piecing the blocks but I was in a wee bit of a hurry to complete this and I really wasn't in the mood for perfection. Don't get me wrong - I'm a neat and pretty accurate quilter...but I just wanted something fun and fast. 
I started with this oh so charming charm pack from Moda...
...and picked out 6 squares to start
Now remember, my head was already bursting from blogland overload...I didn't have it IN me to figure out measurements.  The nice thing about this technique is...you can work with any size starting square - just follow the basic cutting steps. 

Here's what I did....

I stacked up the 6 squares - all right sides UP - picked up my cutter and ruler - eyeballed the side 'centers' - held my breath....and started cutting the outside 'corners' (you can fold the top square in 4ths and finger press to help you find the centers)
One down....3 more to go
Yey! Four corners cut! 
Now for the next 'round'....move the previously cut corners just a tad out of the way so you don't have an 'oopsie' and cut where you shouldn't (but don't move them too far - you want to keep everything in Order)
You'll notice below that I wasn't worried about straight cuts - I like wonky - wonky isn't supposed to be perfect...if it was perfect...it wouldn't be wonky (and besides...with wonky...you can get away with alot...which I did)
Once all cuts are made - we do a little 'switcheroonie' .... just follow the pictures....

Now we're ready to sew these puppies up! (sorry Maggie, no pup...eh...pun, intended)

You can't see it in the pictures below, but I 'chained' while I sewed the first little triangles to the center squares...and I kept it all together when I pressed so I would keep all the fabrics in Order! 
Many of you are probably familiar with this technique...basically you're just trying to be sure that each of your blocks ends up being made with 3 different fabrics.
I should probably tell you I used 'scant' 1/4" seams.
My little center squares (above) with round 'two' triangles all in place - of course you'll trim away the dog ears...(don't worry Maggie, not your ears...never)
*Note: my outer edges were pretty even (surprise surprise) but yes, some were a tad off - I did NOT trim to straighten them out...I just straightened them up when I sewed on the next round.

Next...stack up the centers...remember "In Order"....and add the round 3 triangles. Don't worry if you lose your 'points' - that's what wonky is all about!
Continue adding til all four corners are added - press - and those dog ears?....you'll get rid of them in the next step. (woof)

Here's what we've got so far....
I trimmed everything up to 3-1/2" square. Yes, I'll probably lose more points with the next step...and I don't care...because...they are Wonky!
Originally I was going to stop right here...but I was having so much fun and decided Mom wouldn't have much use for a 'mug rug' - so I grabbed some more charms from the pack and auditioned 'backgrounds' with the blocks made so far...
yes...these will do nicely.  (oh...did you notice there are now 9 blocks and not 6? I couldn't help it - they were so much fun, I just had to sneak away and make 3 more when you weren't looking).

To make the final triangle corners...I cut each charm square 'background' like this
Easy peezy...just cut corner to corner. Handle with care because now you are working with 'bias' edges...don't let them scare you...but be gentle all the same.

Sew the final corners on...press.  
I squared the blocks up to 4-3/4" which gave me a 1/4" seam at each point. (they could have easily been trimmed to 5"square but I wanted hoped the points would "meet" when the blocks were sewn together - it's totally up to you).
Finishing:
Sew the blocks together to make a big 9 patch.
The little yellow accent border was made with TWO strips cut 1" 
The final pink border was made with TWO strips cut 3-1/2".
Binding was made with TWO strips cut 2" (same fabric as the final border)
I simply stitched in the ditch between the rows...and around the first big  'square on point'.

And last but not least....inspired by Bonnie Hunters quick little labels (a square folded on point and sewn to one corner before binding is finished)...ta-da...the label.

I hope you enjoyed this little project of mine. To see more 'Square in a Square' entries...visit Persimon Dreams Flicker group by clicking HERE...or take a peek at her linky party at the bottom of the page when you click HERE (that's where I'm going now - oops..on second thought it's almost 4am. 4:30am....my how time flies...maybe I'll grab a few zzzz's first...lol)
Lynn ~ The Thimblemouse >"<


LinkWithin

Related Posts Plugin for WordPress, Blogger...